


Backing up a Mac using Time Machine
What is time is Time Machine:
Time Machine is the built-in backup feature of OS X. It keeps a copy of all your files, and it even remembers how your system looked on any given day so you can revisit your Mac as it appeared in the past.
Things you will need:
Before you can use Time Machine, you need to select a backup destination. You can back up your files to:
- an external hard drive connected to a USB, FireWire, or ThunderBolt port on your Mac
Time Machine keeps hourly backups for the past 24 hours, daily backups for the past month, and weekly backups of before that. The oldest backups are deleted when your backup drive becomes full.
Best way to use time machine?
Use it with an external drive!
How to backup using Time Machine:
Setting up Time Machine is as simple as connecting an external drive to your Mac. If you haven't already specified a backup device, Time Machine asks you when you connect a blank drive to your Mac if you want to use it for backing up.
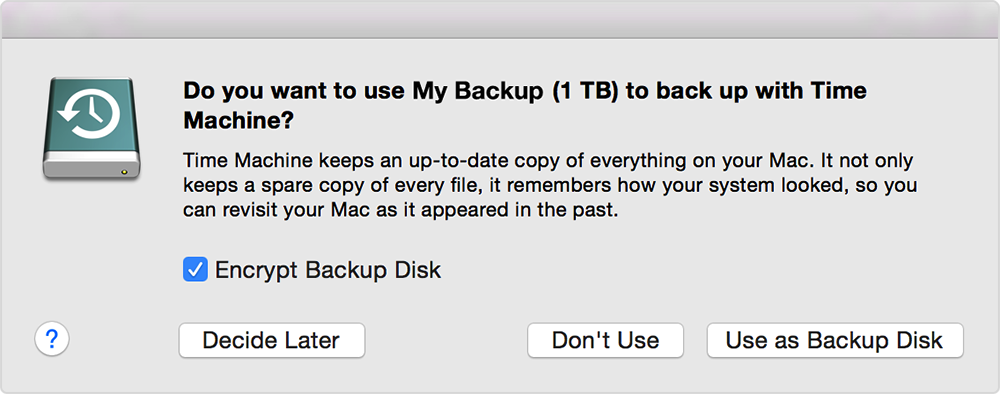
- Click "Use as Backup Disk" to select this drive as your backup destination.
- Select the option to Encrypt backups if you want to prevent other users from accessing your backup without a password.
Your Time Machine drive needs to be formatted as Mac OS X Extended (Journaled). If you select an NTFS or FAT-formatted drive, Time Machine prompts you to reformat the drive.
Important: Reformatting erases any files on the destination drive. If you're not sure if you want to erase the drive you connected, choose a different drive.
Backing up:
Backing up happens automatically when your Time Machine drive is available.
Your first backup may take a while, depending on how many files you have on your startup disk. You can continue to use your Mac while Time Machine is working. Time Machine displays a notification after your first backup is complete, or if any issues happen during the initial backup.

Backup Status icons and there meanings:
 |  |   |
| idle | backup in progress | cannot back up |
Restoring data from backups:
With Time Machine, you can go "back in time" to restore files, versions of files, or your entire system. If Time Machine alerts you that your Time Machine backup disk can't be found, make sure your backup drive is connected and mounted.
Switch to the Finder, then choose Enter Time Machine from the Time Machine menu to see earlier versions of your files and folders.
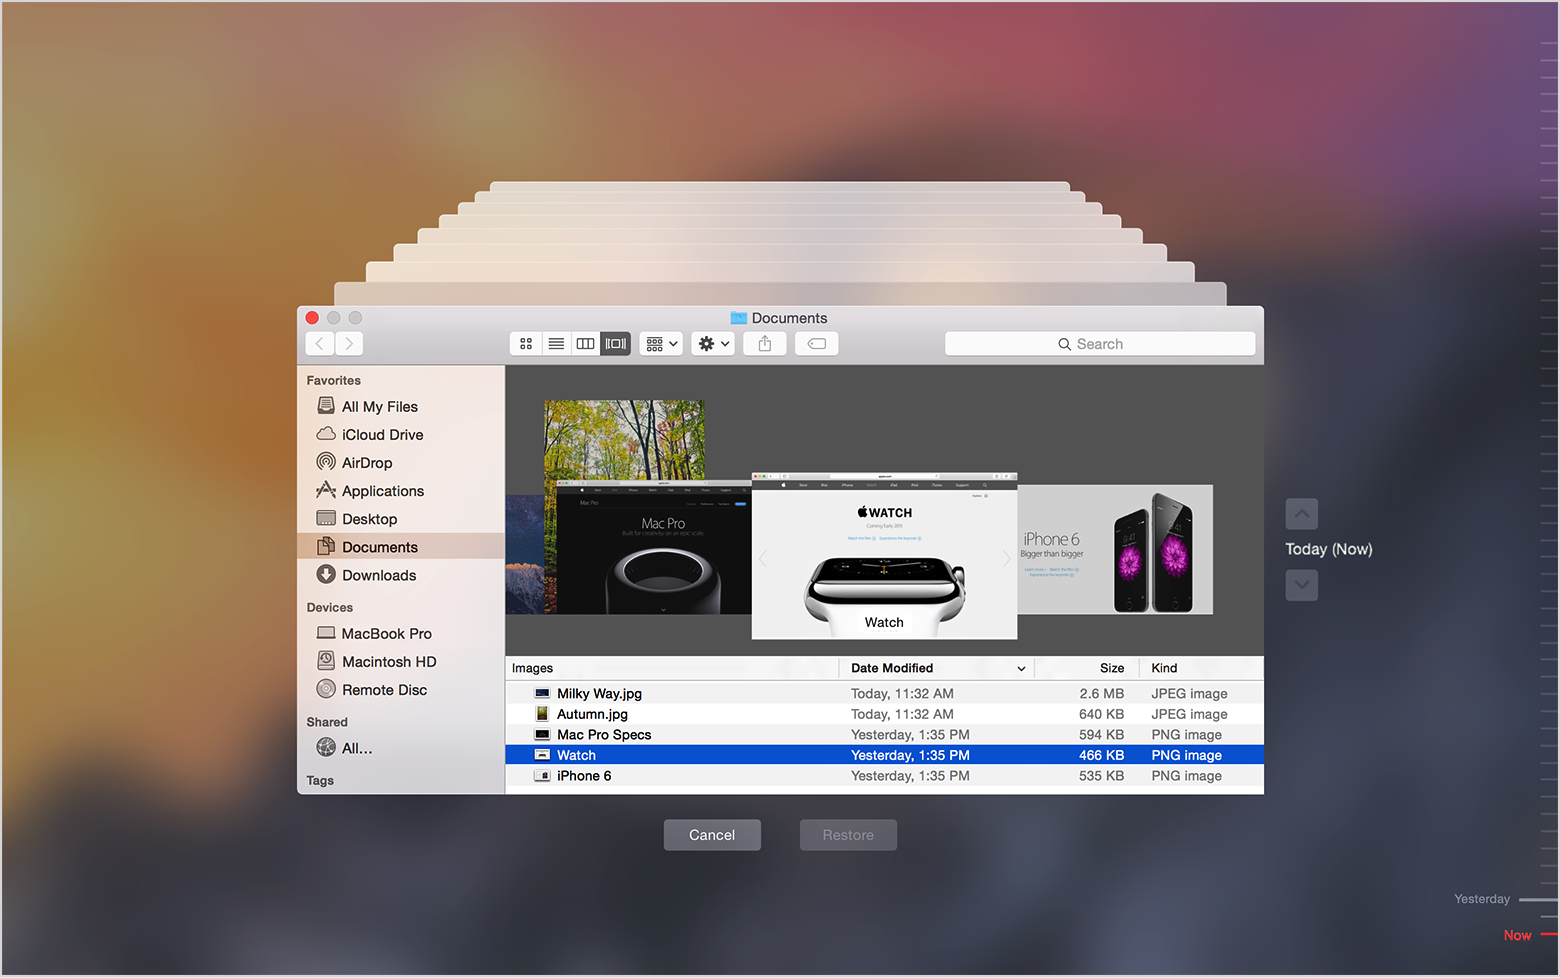
- Use the timeline on the right side of the window to reach a certain point back in time. The timeline shows the times of all backups on your backup drive. If you don’t know exactly when you deleted or changed a file, you can use the back arrow to tell Time Machine to travel through time to show you when that folder last changed.
- You can also search for a file using a Finder window. From the Finder, enter Time Machine. Then, enter a search term in the search field of the Finder window. Use the back arrow to have Time Machine search through your backups to find what you are looking for.
- To restore a file, select the file/folder and click the "Restore" button. The file will automatically be copied to the desktop or appropriate folder. If the file you are restoring has another file in the same location with the same name, you will be prompted to choose which file to keep or keep both. Right-click or control-click on a file in the Time Machine window to see additional options.
- If you're not sure if you're restoring the right version of a file, you can use Quick Look to preview the file's contents first. Highlight the file and press the Space Bar to take a closer look.
You can also revert to earlier versions of your documents from within apps. In apps that support this feature, open a file you want to revert and do one of the following:
- Choose Enter Time Machine from the Time Machine menu
- Choose File > Revert to > Browse All Versions
- Click the Time Machine icon in the Dock


